
Query Builder is a powerful report writing and data extraction tool that will allow users to create reports from any area within SKYWare. These reports can be exported to other applications or used to create mailing labels.
The type of report and information that can be pulled onto a report will depend on the screen that you are on when you access Query Builder.
Query Builder:
There is a Query Builder icon located in the local toolbar of many screens in SKYWare. Click on the icon to open the Query Builder screen.
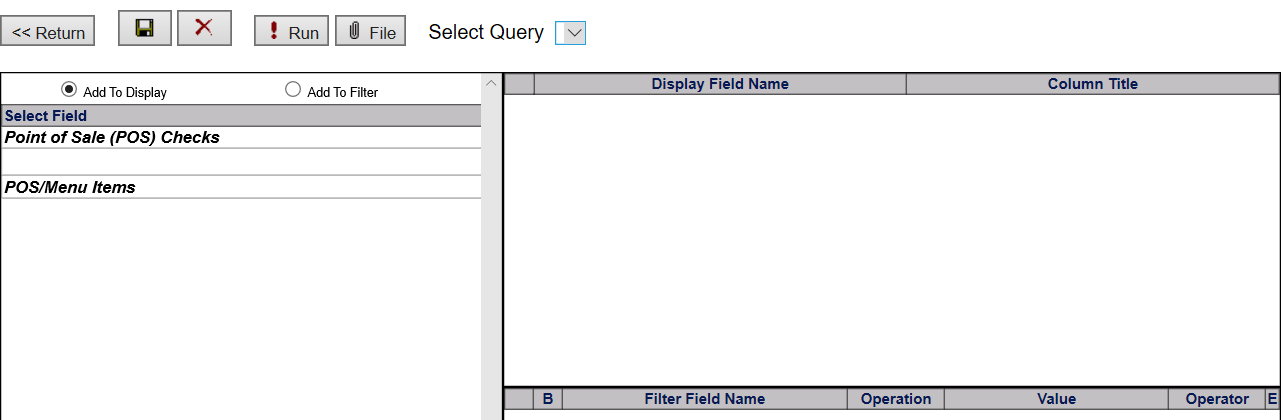
Once you are in the Query Builder Screen, the top portion allows you to retrieve or save a query.

It also allows you to return to the previous screen.
NOTE: When creating a report - always save the report first and then build it.
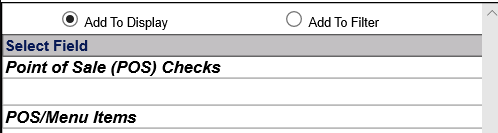
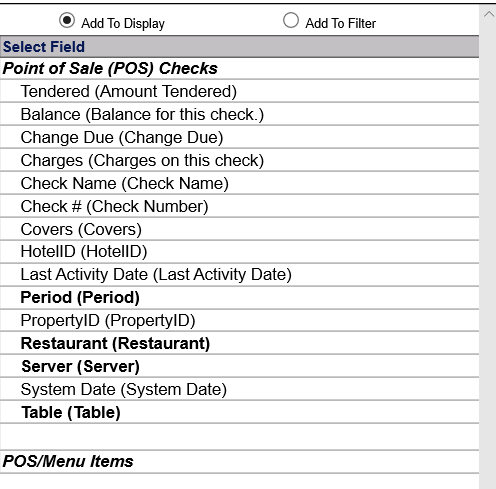
The left side displays the available fields to choose from. (This list will change based on what form the Query Builder icon was activated from). Fields in bold are expandable. That means they are "categories" that have several field options which will be listed directly below and slightly indented. The right side is where your selected fields and filters will display.
Make sure to select the Add to Display box ( left) when you are selecting Display Fields,(top right screen) and the Add to Filter box ( left) when you are adding Filter fields (bottom right screen).
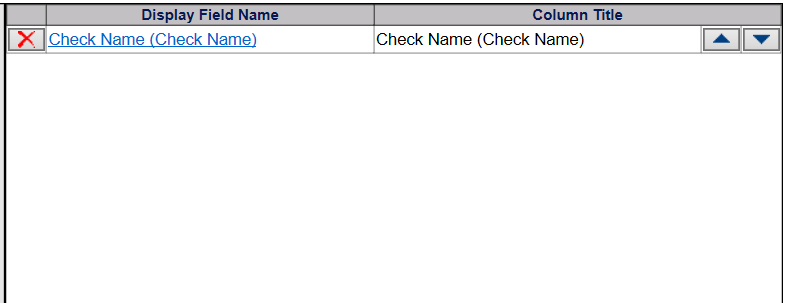
The Display Field Name section contains the fields that will appear on your report from left to right.
To select display fields, make sure Add to Display is selected in the upper left of the screen, check all of the fields you want for your display and click on the Add button. That will move the selected display fields to the box in the upper right.
Each selectable field will have a check box next to it. There will be some fields that do not have check boxes and they will be in italics.
 .
.
The selected field will be added to the Display Field Name section. The column title will now have an entry. A delete button will also appear to allow removal of the selected field if desired, and up and down arrows to move the field up or down the list.
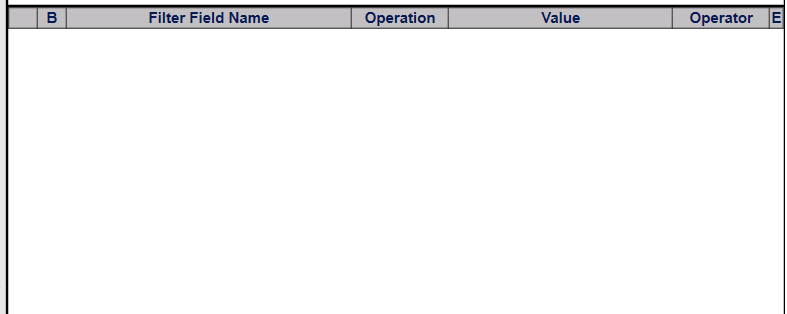
The Filter Field Name section contains the fields that will allow you to add or alter parameters for limiting the information that appears on your report.
To add a filter, make sure the Add to Filter box is checked in the upper left of the screen, select the desired fields and click on the Add button. That will move the selected filter fields to the box in the lower right. After a field is selected, double click on the field.
Filters will enable you to select the specific information for the report. For example, you may want a report showing companies for Virginia and Maryland. The criteria or "filters" for the report would be that the State Code is equal (=) to VA OR the State Code is equal (=) to MD.
B: Begin Group: This is to start the filter with an open parenthesis or “(“. You must use parenthesis when choosing multiple queries. The parenthesis sets the order of precedence for the filters (think of it as a mathematical equation where the items in the parenthesis would be calculated first and then applied to the rest of the equation.)
Filter Field Name: This field defaults to the item chosen to have a filter on.
Operation: The operation determines how the filter is going to be applied to the “value”.
There are several choices:
= Equals. The result will be everything equal to the value.
< Less than. The result will be everything less than the value (excluding anything equal to the value).
<= Less than or equal to. The result will be everything less then or equal to the value.
> Greater than. The result will be everything greater than the value (excluding anything equal to the value).
>= Greater than or equal to. The result will be everything greater than or equal to the value.
LIKE. The result will be anything similar to the Filter Field Name. For example, FILE NAME LIKE N, will retrieve all files that start with the letter “N”.
NOT LIKE. The result will exclude anything in the value field. For example, FILE NAME NOT LIKE N, will retrieve all files except ones that start with the letter “N”.
IS NULL. The result will retrieve all records where the value is blank.
Value: This is where the criteria for the “Filter Field Name” are entered. A % sign can be used as a “wild card” when the “LIKE” operation is chosen. The “%” means “contains”. For example, a filter for a room type is created. The result is any room type that contains the letter “D”. The value would be %D%. This would retrieve any records that contained a D regardless of the position of the letter in the room code. For another example, if the result of the report were to get all files that began with the letter “M”, then the value would be M%.
Operator: There are two choices for the operator - AND and OR.
Using AND will make two filter equal each other.
Using OR will make the filters mutually exclusive of each other.
For example, the report being created is for a specific state code and for a specific sales manager.
The filter would read: Sales Manager = NBD AND State Code = VA. This will retrieve all files for Sales Manager NBD that have a state code of VA. If, for example, the report being created was for two specific market codes, OR would need to be used because a file can only have one market code. (State code is = to VA OR state code is = MD
E: End Group: This will close the parenthesis, or add an “)” to the end of the filter.
Filter Guidelines:
For a filter that show date between two dates, select the date field twice, and user date is greater than AND date is less than
Place any date filters first.
If several filters exist, use the “Begin Group” and “End Group” features to separate or group filters together. Usually, date filters need to be grouped if used with other filters.
Troubleshooting Queries
The filters are critical in obtaining the correct information. If it appears data is missing from the report, all filters should be re-examined. Filters must be placed in a “logical” order. If not, the program will not gather all the needed information. Simply double click on any filter to check it.
If data still appears to be missing, then experiment with changing the orders the filters are listed. Place the more difficult search filters at the top (for example date filters) and easier filters last (for example status filters).
If data still appears to be missing, start with one filter, execute the report and then continue adding filters until the filter causing a problem is identified.
Configuring the Display Fields
Before executing the report, the Display fields can be configured to customize the title of each field as well as determine a set width for the column. To configure a Display field, double click on the field. The following screen will appear.
Display File Name: This field displays the name of the field chosen. It cannot be modified.
Title: The description of the field can be changed here. In the example above, the field name is FILE #. The field name can be changed to File Number to be more descriptive. Sometimes the field name may be very long and it could be shortened to save space on the report.
NOTE: The “Display Field Name” field will appear on the extracted report regardless if the “Title” field has been modified. There is no need to change the field name if the information is going to be used to another application.
Size: This displays the size of the field in inches. It can be changed, however the default is usually the best option.
Sort: The drop-down choices are: No Order, Ascending, Descending. The field defaults to “No Order”, which means that the field will not appear in order. Ascending can be chosen for both numeric and alphanumeric fields. Ascending will display numeric fields from the lowest number to the highest number and alphanumeric fields from A – Z. Descending will do the reverse.
Format: Formatting is available on date and numeric fields. The Format feature can display the data in a particular fashion. For example, a date field can be displayed with either the long date format (i.e. June 22, 2001) or the short date format (i.e. 6/22/01). The current options for numeric fields are with or without two decimal places. Additional options will be added to the format list.
Aggregate: The aggregate options are to be applied to numeric fields. The choices provided are: Avg, Count, Min, Max, Sum.
Avg – This will show an average of the field.
Count – This will count the number of records for the field.
Min – This will show the minimum value for the field.
Max – This will show the maximum value for the field.
Sum – This will sum the field.
NOTE: These do not provide totals at the bottom of the column. For example, if a report is created using File number and Total Food Revenue per booking and the “SUM” was selected as the aggregate, the report would display the TOTAL of all the bookings revenue for that file in the field. So if the file had five bookings, the report would show the file number once with the total food revenue for all five bookings in the Total Food Revenue Column.
# of Characters: The number of characters can be determined so that a field will not exceed the specified number. If a particular name does exceed the number of characters, the name will truncate.
# of Digits before the decimal: The number of digits before a decimal can be determined before a decimal point. If the number in the field is larger than the number specified, the number in the field will truncate.
# of Digits after the decimal: The number of digits after a decimal point can be determined. If the number in the field exceeds the number specified, the number will be truncated.
Leading Zero’s: This check box will fill empty spaces with a “0”. So for example, if the value is 55 and there are 4 places before the decimal, the number would appear as .000055 on the report.
Once the display fields and filter has been set, click on the button to execute the report to screen. Clicking and dragging the column separator can adjust the columns, once the report is being viewed on the screen.
Exporting the Report
After a report has been created, it can be exported to a file and then imported into other applications
To export a report, click on the button and the following screen will appear:
The delimiter determines which cell the field will placed in on a spreadsheet or table. The recommended delimiter is a Tab delimiter. Excel defaults to a tab delimiter when importing the file. Also, there is a less chance of having a tab inside of a field name than a comma. (If, for example, comma delimiter is selected and the File name for a group is ABC Company, Incorporated, the word Incorporated will be placed in a separate cell because the comma determined which cell each item goes in).
After the file has been saved, the system will ask you to download it. Your data is saved in this file.